Posts

Showing posts from 2015

Working with ASP.Net controls to Insert, Update and Delete with SQL Server Database - No Coding
Image
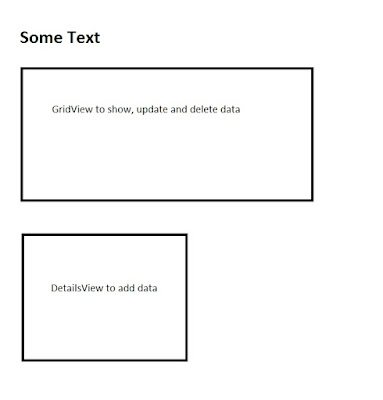
Working with ASP.Net controls to Insert, Update and Delete with SQL Server Database - No Coding This blog will teach you how to create a simple application using ASP.Net controls and MS SQL database. We are going to do this without any back end C# codeings. :) Following shows the page that we are going to create. It has function to: 1. Show some data (I use Employee data) 2. Manage those data (Insert, Update, Delete) Step 1 Go to Visual Studio. Create a "ASP.NET Empty Web Application". Step 2 Create a new aspx page. I'll create a page called home.aspx. Step 3 To show, update and delete data we will use - ASP GridView To insert new data we use - ASP DetailsView To bind the data to these controls we use - SqlDataSource Drag and drop following ASP controls from the Visual Studio toolbox to the home.aspx. Switch to the design mode and drag and drop those controllers as you want. On the GridView and the DetailsView, set the SqlDataSource

ASP.Net MVC Tute 4 - Create a List from IList

Image
ASP.Net MVC Tute 4 - Create a List from IList In this post I'll explain how to show data in a list. I have define this inside the Controller's Item ActionResult. You can arrange these in proper locations. 1. Create IList using a Model.         private static IList<Item> items = new List<Item>()         {             new Item()             {                 Id = 1,                 ItemName = "iPhone",                 Price = 99000             },             new Item()             {                 Id = 2,                 ItemName = "Lumia 520",                 Price = 25000             },             new Item()             {                 Id = 3,                 ItemName = "xBox 360",                 Price = 50000             }         }; 2. Pass that list to a View         public ActionResult Item()         {             return View(items);         } 3. Show list data within the view. Use IEnumera

ASP.Net MVC Tute 3 - Data Passing and Navigation

Image
ASP.Net MVC Tute 3 (Starter) - Data Passing and Navigation Let's see what are the other methods that provided to pass data to Views and Navigate using links. View Data and View Bag ViewData is a dictionary like data type. Inside controller: ViewData["ItemData"] = "Item data"; Inside View: View Data: @ViewData["ItemData"] ViewBag is dynamic data type Inside controller: ViewBag.ItemBag = "Item data in a bag"; Inside View: View Bag: @ViewBag.ItemBag TempData is use to store data that is survive for redirect. Inside controller: TempData["Survive"] = "Item data survived"; Inside View: Temp Data: @TempData["Survive"] URL Navigation 1. Lets create another ActionResult in ItemsController.         public ActionResult Item()         {             return View();         } 2. Create a view called Item by right click on the View and Add View. <!DOCTYPE html> <html> <

ASP.Net MVC Tute 2 - Create a Project

Image
ASP.Net MVC Tute 2 - Create a Project In this post I'll explain how to start ASP.Net MVC project. Step 1: Create a MVC Project 1. Open Visual Studio 2. Select New Project 3. Under Web category 4. Select ASP.NET MVC Empty Web Application 5. Give a suitable name (I choose ERP, because we are going to do some ERP related functionality and our final product will be a tiny ERP solution.) and suitable path to store the project. 6. Click 'Ok'. Your project will be created. Now lets start the fun part. Lets get a small scenario. Scenario 1: Show some item details on item page. Lets consider and apply this to the MVC concept. To do that divide the sentences to MVC ;) Show some items details - This means view. View should have some item details. Then there should be a Item - Model Show item details on item page - This is the Control with the Model and the View. Ok then. Lets apply what we have found. 1. Create a Item model inside the Models folder. (I

ASP.Net MVC Tute 1 - The Theory

Image
ASP.Net MVC Tute 1 (Starter) The Theory The theory is inside the name it self. M - Model V - View C - Controller When ASP.Net MVC project is created you can see there are 3 folders for Models, Controllers and Views within the project structure (See the figure bellow). Models folder  We create normal classes. Ex. Item class. public class Item { public int Id { get; set; } public string ItemName { get; set; } public double Price { get; set; } } Controllers Folder Use to handle the business logic. Ex. Create new Item public ActionResult Index() { Item item = new Item(); item.Id = 1; item.ItemName = "Lumia 820"; item.Price = 35000; return View(item); } Views Folder Use to manage the front end. Ex. Display Item details. @model ERP.Models.ItemModels.Item Index This is the Item page.

ASP.Net with MS SQL Database

Image
In this blog I'll explain how to create database in MSSQL and connect it to ASP.Net web application. 1.  Create a database Employee. Set identity to the ‘id’ column. This will auto increment the id by 1 each time when the record is added.  2. C reate a Stored Procedure called ‘AddEmployee’. Stored Procedures are queries that you can write once and execute multiple times.  Set the required parameters using following format: @parameter_name parameter_type (size) 3.  Create empty ASP.Net project using Visual Studio. 4.  Add ConnectionString attribute to the Web.config file to get connected with our database.  5.  Create a dbConnection.cs to get connection string from the Web.config file.  6.  Create Employee class. NOTE: If you are using AJAX this class might be a problem when the JSON object names are not matched with this object property names. So decorate the class properties with the JsonProperty attribute.