Posts

Showing posts from 2019

Publish a .Net Core Web API with Entity Framework Core to Azure (App Service) - Express Guide

Image
Azure - SQL Database ( https://azure.microsoft.com/en-us/pricing/details/sql-database/single/ ) - ~$4.8971/month 1. Create SQL Server database instance Azure provides different options for SQL Databases: Databases offer the following deployment options: As a single database -With its own set of resources managed via a database server. A single database is similar to a contained database in SQL Server. This option is optimized for modern application development of new cloud-born applications. Hyperscale and serverless options are available. An elastic pool -Is a collection of databases with a shared set of resources managed via a database server. Single databases can be moved into and out of an elastic pool. This option is optimized for modern application development of new cloud-born applications using the multi-tenant SaaS application pattern. Elastic pools provide a cost-effective solution for managing the performance of multiple databases that have variable usage patt
Publish .Net Core Web API to Azure (App Service) - Express Guide

Image
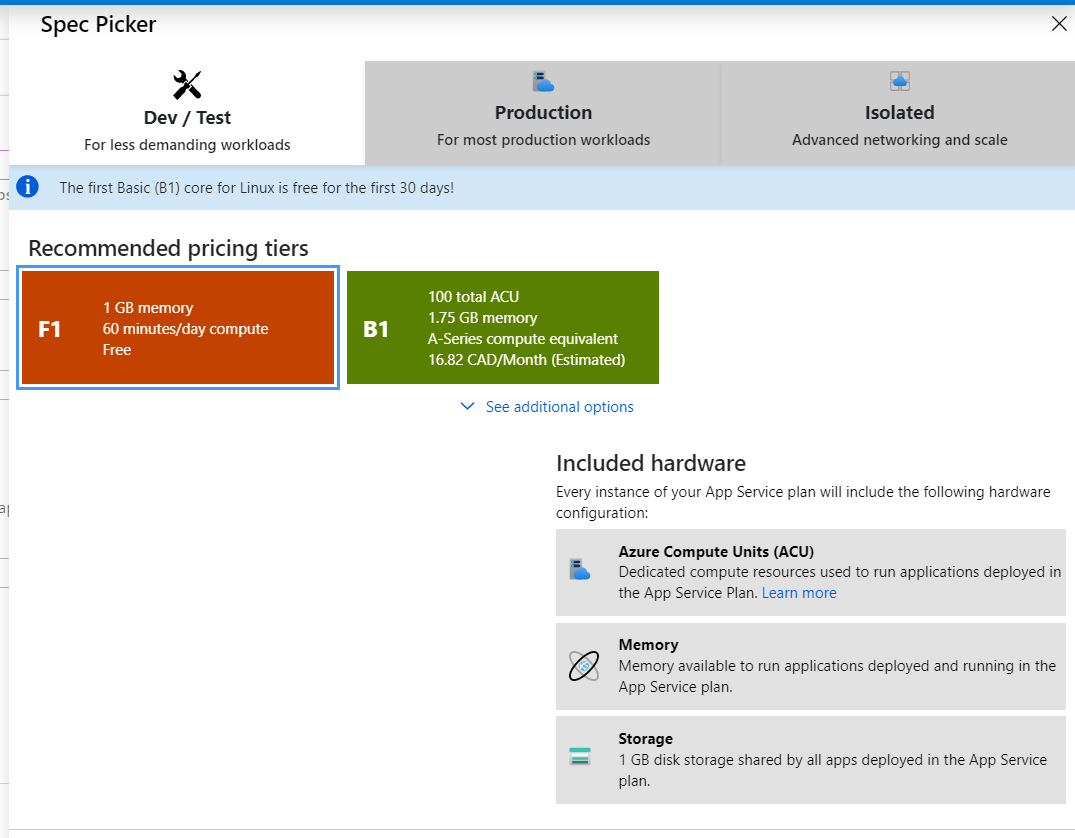
Required Azure Services - App Service ( https://azure.microsoft.com/en-us/pricing/details/app-service/linux/ ) - Have a Free tier Create Azure App Service (Web App) 1. Login to your Azure portal. 2. Search for 'App Services' and select it 3. From the App Services window click on 'Add' - This will redirect you to create Azure Web App page 4. Select your Azure Subscription and Resource group (Create new one if you don't have any) 5. Give instance name, select Publish mode as Code 6. Select your Runtime Stack (.Net or .Net Core version which supports your application). 7.You can select either Windows or Linux as Operating System. I used Linux because I'm hosting a .net Core Web API with Entity Framework Core. NOTE: If your app is .Net standard application you have to select Windows. 8. Select Region as you like. 9. Select App Service Plan. - Create new App Service plan if you like or you can keep the auto generated name. - Select Sku (Stock Keeping

Host a Static Web Site with Azure and https - Express Guide

Image
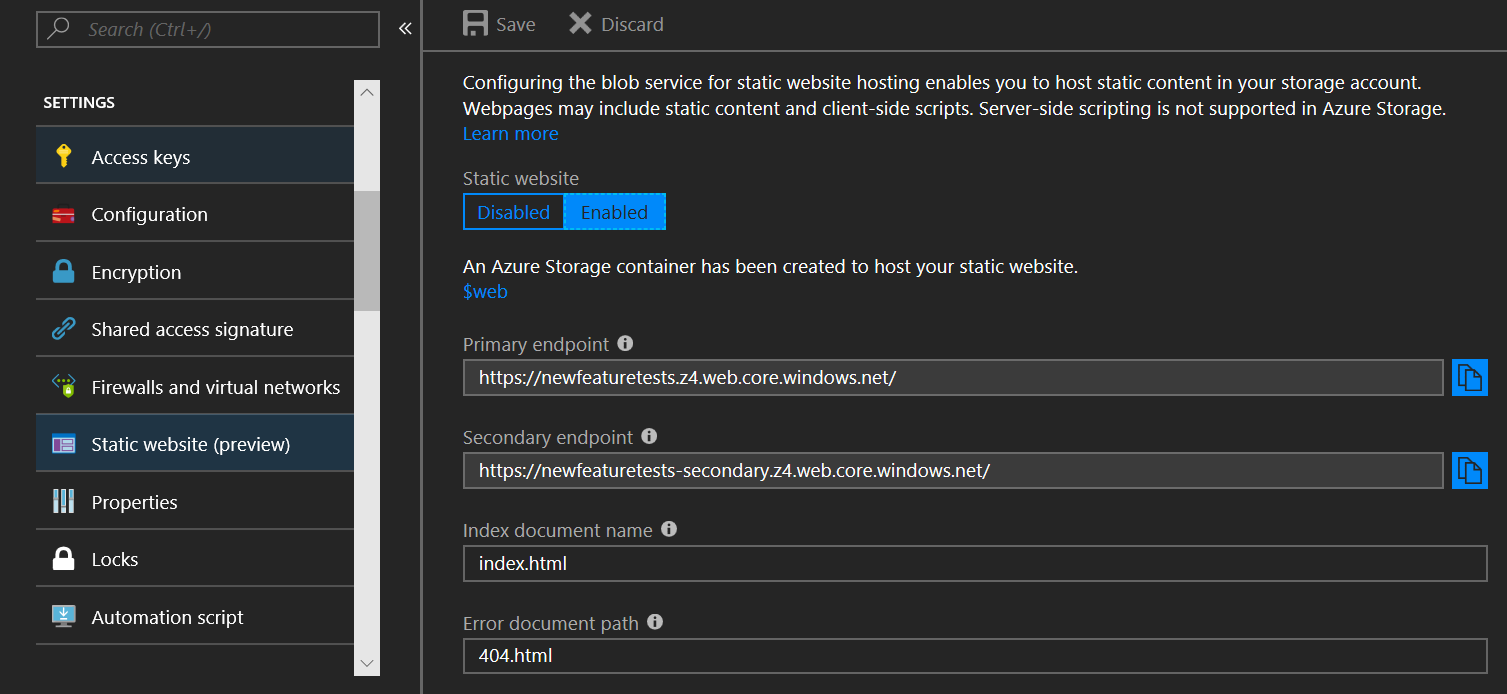
Picture Source:  https://azure.microsoft.com/en-ca/blog/azure-storage-static-web-hosting-public-preview/ Create a static web site 1. Login to Azure portal (If you donat have you can signup for free) 2. Go to storage accounts and cerate a new storage account with your desiered name. 2.1. Make sure to select 'Storage V2' in Account Kind. 3. Go to Static Website under newly created Storage Account. 3.1. Enable it and give index page (index.html) and error page (404.html). 3.2. Save. 3.3. Copy the Primary endpoint to later use. 4. Go to Containers under newly created Storage Account 4.1. Inside that you can see $web container - which holds your websites' files (html, javascript, css) 4.2. Upload a file(s) - I uploaded as index.html which I have set as my index page, so when I use my url; the content of this page will be shown. NOTE: You can download and use Microsoft Azure Storage Explorer to update the files in $web. 5. Open a new tab in your browser and paste

Entity Framework Core with SQL Server on Mac

Hi All mac and microsoft tech lovers, There was a time where we love to use our macs and microsoft technologies but since there were not quite compatible with each we have to use windows os to work with microsoft technologies. But now microsoft has developed tools and compatibility to do this on any os. So here I would like to show you how to work with SQL Server and Entity Framework Core in your mac. Lets get started... You have to have docker in order to use SQL Server on Mac. So if you are new to this and would like to learn how to do that please read my blog from here and come back to this. Ok.. I think you have set up Docker, SQL Server and Azure Data Studio. I'm going to use Visual Studio for Mac as my IDE. If you like to use that you can download it from: https://visualstudio.microsoft.com/vs/mac/ . Lets continue then.. 1. Open Visual Studio for Mac (VSM) and create a Web API project. I call it MyAPI I'm going to create a project with N-Tier architecture,

Tool to Synchronize email templates between different SendGrid accounts

Hi All, Here I'll directly provide my code where I developed a tool to copy email templates from one SendGrid account to another SendGrid account. It is nice to have a such tool when migrating all of your newly created and modified email templates from develop environment to production servers. So here is the code that I have came up with: public class EmailSyncService : IEmailSyncService { private readonly EmailSyncSettingsModel _emailSyncSettingsModel; public EmailSyncService(IOptions<EmailSyncSettingsModel> emailSyncSettingsModel) { _emailSyncSettingsModel = emailSyncSettingsModel.Value; } public async Task<List<KeyValuePair<string, string>>> SyncSendGridTemplates(string source, string destination) { var newTemplates = new List<KeyValuePair<string, string>>(); var sourceKey = _emailSyncSettingsModel.GetType().GetProperty(source).GetValue(_emailSyn

Work with SQL Server in Mac like in Windows

Image
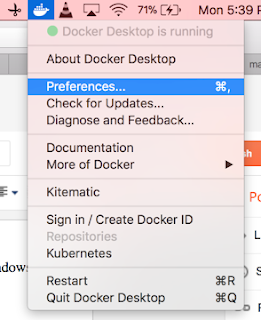
Hi all Mac and SQL Server lovers, In this blog post I will explain you how to work with SQL Server in your mac like in a windows machine. Lets start. Start SQL Server in Mac  1. Install docker ( https://hub.docker.com/editions/community/docker-ce-desktop-mac ) 2. Increase the memory to 4 GB You can do this by going to docker --> Preferences --> Advanced   3. Open the terminal and type bellow command  docker run --name sql3 -e 'ACCEPT_EULA=Y' -e 'SA_PASSWORD=sysAdmin@123' -p 1433:1433 mcr.microsoft.com/mssql/server:2017-latest-ubuntu This will download and install SQL Server 2017 for linux If you want different version of SQL Server, then you can find it from here:  https://hub.docker.com/_/microsoft-mssql-server NOTE: When providing a password for  sa (System Admin), it should meet the following criteria:  A t least 8 characters long contain characters from three of the following four sets: Uppercase letters, Lowercase letters, Base

Angular 2+: Passing data between components (Quick Note)

Hi devs, This is a quick note to guide you how to pass data between components. There are 2 main ways of doing this: 1. Passing data from Parent to Child 2. Passing data from Child to Parent 1. Passing data from Parent to Child - using @Input() 1.1. Add variable to child component to retrieve value child.component.html < p > Value from parent: {{parentValue}} </ p > child.component.ts parentValue: string; @Input() set valueFromParent(value: any){ this .parentValue = value; }; 1.2.  Pass value from parent to child parent.component.html < app-child [ valueFromParent ]= "parentValue" ></ app-child > parent.component.ts export class ParentComponent implements OnInit { parentValue: string = "sss" ; constructor () { } ngOnInit() { } } 2. Passing data from Child to Parent - using @Output() and EventEmitter 2.1. child.component.ts @Output() valueForParent = new EventEmitter<string>();